After making the move from my small single bedroom with den home across town to a much larger four-bedroom house with a detached garage, I’ve been fighting with my WiFi issues in the detached garage, outdoors and master bedroom on 3rd floor.
I stuck with dead spots throughout the house, and even more important I couldn’t figure out how to get a signal out into the back yard or the detached garage about 120’ feet away from the house.
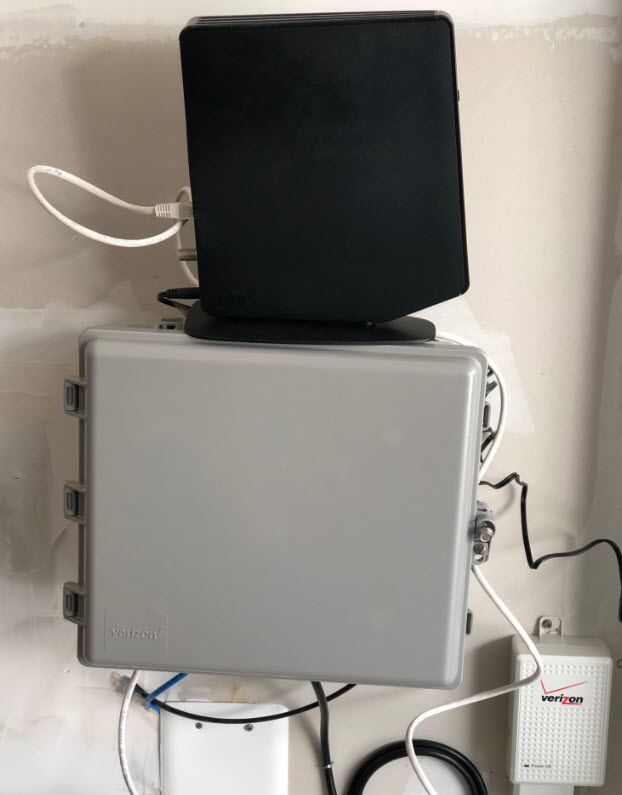
My home router is one I rented from Verizon Fios, technically this router beats one on the Amazon market place or brick and mortar stores near my home. This is a perfect Router for my old Apartment or smaller home but home as large as mine will have some issues due to the location of the router with respect to coverage I am expecting from it. Here the picture of my current home router:
It took 10+ hours of serious research to figure out exactly how to solve my problems with WiFi dead spots in my home. After looking at the information on wireless bridges, powerful routers, power line WiFi Adapters, and repeaters. I came up with these 8 solutions that really work for anyone want extending WiFi reach to detached garages, outdoors and other places in my home.
Extending to a detached Garage/Outdoors:
Getting WiFi out to a detached garage is a serious challenge that many homeowners struggle with when they are setting up wireless connections. Fortunately, there are several different solutions that can effectively solve the problem with a bit of hands-on. Below are the best options from simplest to most difficult to employ.
If you don’t have time to read the whole content, here’s a simple summary of the methods I discussed in the following content:
Ways to Extend your WiFi Range to Garage and Outdoors:
Invest in a More Powerful Router – If you have an older router, or you can’t get enough range with a basic router, you can increase your WiFi network range by investing in a more powerful product.
Use a Wireless Repeater – This is an affordable way to stretch your wireless network in one direction, but only works well over short distances.
Invest in a Powerline Adapter – Choose this option if you have quality wiring through your home and don’t want to run Ethernet lines inside or out.
Buy an External USB Antenna – This is an affordable option that can increase your network strength when a powerful router is already installed.
Use a Point-to-Point Antenna Setup – This is the best option when going over distances longer than 300 or 400 feet.
Bury an Ethernet line and use an Access Point – Do this for the most stable internet connection.
Use an Outdoor Access Point – use this to extend your network to multiple outdoor locations, or into larger outdoor spaces.
Method 1 – Carefully Position Your Router
The simplest solution is to move your router as close to the section of your yard or detached garage you want to be connected as possible. The closer you are to that section of your yard or detached garage or Mother-in-law suite, the better the signal is going to be.
If you have a smaller home, you can probably put your router right near the wall where you want the strongest outdoor signal, and still enjoy a decent connection in the rest of your home. This works well if you can still get a solid connection throughout your home where it matters most.
For a mid-sized home, you should position your router halfway between the center of your home and the garage or section of yard that you want your signal to travel. In this configuration, most of your home will still have a solid internet connection, but you will also extend your network connection beyond the walls of your home as well.
If you have a larger home, your best option is to position your router centrally in your home. This gives you a good signal throughout your space and will often still give you a bit of range out away from your home. You can also change the direction of one or two external router antennas of your router, position those antennas towards to your yard or the outdoor space you want a better signal at to improve the signal range significantly.
Just be careful to put the router in a location that’s going to give you an effective connection throughout your home, otherwise, you’ll have a new problem to solve. If you can’t manage to get the signal far enough outside the walls of your home, you will have to upgrade the router or select one of our other WiFi transmission techniques to get the network connection right where you want it to be.
Method 2 – Get a More Powerful Router
If you’re using an older router or a router with weak transmission power, you can greatly increase your range by upgrading to a modern and powerful router with a higher power level.
Look for a router with many external antennas and powerful amplifiers for the most widespread signal. Just upgrading to a new and more powerful router might be all you need to do to increase the range of your network signal effectively.
The first step to choosing a high-quality modern router is to select an AC router. This is currently the fastest specification, and one of the most reliable for achieving long-range WiFi networks because the router can broadcast both 2.4 GHz and 5 GHz signals at the same time.
The next thing you should look at is the antennas that are included with the router. External and long antennas are important investments. Larger antennas often indicate a larger range transmission as well. Most quality routers have at least four antennas and some have as many as eight antennas that you can rely on. External antennas are important because you can change the direction of your router antenna and increase the Wi-Fi range even further.
Most routers will list their maximum range covered right in the product specifications and it’s important not to take this number as a real-world figure. If a router says it will reach up to 300-foot range, it is more likely to reach between 150 and 200 feet in a real-world situation with walls and other obstacles in the way. Always assume you will get half the rated range or less unless you have an open concept home with very few walls in the way.
Carefully purchase an AC router with a large distance rating and several external antennas for the best results when upgrading your router to help you get an internet connection out to your garage or into your yard.
Method 3 – Use a Wireless Repeater
A repeater is a device that copies your original wireless router’s signal and re-broadcast the signal to help it reach further. Add a repeater as close to your yard or garage as possible while still getting a good signal from your original router with the device.
Most repeaters have an indicator on them letting you know that you still have a strong network connection. Once you get the repeater in the right position, it will send the signal out into the yard effectively by amplifying the signal at the new location.
A wireless repeater is a powerful electronic device that is another source of the same signal that your router already sends out. It takes a strong signal and pushes that signal even further away from the original source. Repeaters are an affordable and simple way to extend the range of your WiFi signal. A decent repeater can be had for less than $25.00 and won’t take long to install. Wireless repeaters can be purchased with ratings at the maximum WiFi transfer speeds available today, but most devices won’t allow you to achieve those speeds even in very good conditions. You can expect between 75 Mbps and 300 Mbps using a quality repeater properly, and the speed you get depends on how far you are away from the repeater when accessing the network, and how many walls the signal is traveling through. Limit these factors as much as possible for the highest speeds.
Method 4 – Get Internet with a Powerline Network Adapter
The next option is what’s known as a Powerline Network Adapter. If you are running power out to your garage from your home, you can send internet connection information through the power lines of your house to get a connection out to your garage.
For this to work, you’ll need a powerline adapter kit and two ethernet cables. Install the first adapter in the same room as your router in your home and run an ethernet cable from the router to the adapter. Now, install the second adapter in your garage and run an ethernet cable from the adapter to your computer. You can also connect a network bridge for multiple wired connections, or an access point for a wireless network out in the space.
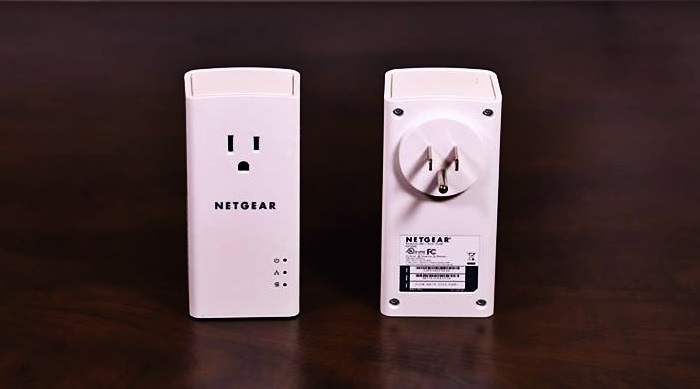
A powerline adapter is a set of two devices, a transmitter, and a receiver. The transmitter is connected via an ethernet cable or wireless connection to the router of your home. This provides the transmitter with the necessary internet access. It is then connected to the electrical wiring of your home by connecting it to the nearest outlet. The receiver in the set is connected to an outlet near your home section to which you want to extend the internet. Once it’s plugged in, you can pair the transmitter and the receiver and the two devices will send your internet connection via the power lines of your home.
Method 5 – Add a Powerful USB Antenna to Your Garage
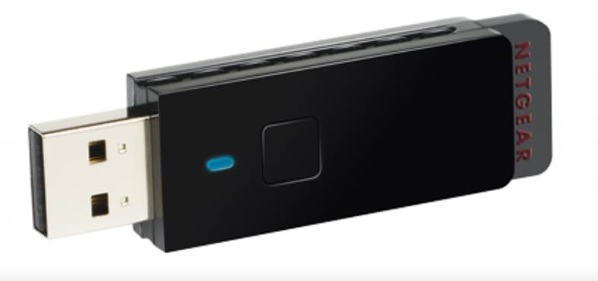
For smaller gaps between home and garage, it’s possible to get a decent WiFi connection just by installing a powerful USB antenna on your computer near the wall closest to the house. A good antenna will pick up on a weaker signal, and you could get a solid connection if your home’s router is near the same side that your garage is located. You likely won’t get a full-speed connection using a USB antenna alone, but it might be enough to give you a good reliable connection. This option is attractive because you won’t have to change your existing router or spend much on equipment. You only need a single USB antenna, but this method won’t work if the WiFi signal is too weak in your garage.
The trick to making this method work well is to purchase a high-quality antenna that’s going to give you the best chance of success. There are many USB antennas available today with below the $20.00 price range, but generally, they aren’t going to do a quality job. When selecting a product you want to look for the proposed maximum range possible, the length, size and number of antennas, the total power output and the maximum speed provided.
Look for antennas that offer 5dBi of power or greater on each antenna. It’s also important to look for a product with detachable antennas that you can use on your computer. Detachable antennas can be replaced with more powerful antennas to give you enhanced range, or they can be extended to a more favorable location using special antenna cable. Either way, detachable antennas give you more control over the effectiveness of your USB antenna setup.
Look for multiple antennas so that you can easily position each antenna in a different direction to maximize your signal strength or help you tune in to multiple WiFi sources. Finally, choose a WiFi antenna that’s AC compatible with a speed rating of around 200Mbps if you can. This means the antenna can deliver very good transfer speeds under optimal conditions. You won’t get those sorts of speeds from your garage or outdoors, but you are more likely to get a superior speed with a higher rated antenna under poor conditions than you would with a lower-rated antenna in those same conditions.
Choosing the optimal USB WiFi antenna takes time, and even after you have a decent product you might have to enhance it further with larger antennas or extension cable, but when installing properly you should have a significantly enhanced WiFi signal at your location.
Method 6 – Lock on with a Point-to-Point Wireless Network
For long-range distances, one of the best options available is a point-to-point wireless network. This technology requires a bit more of an investment but can offer a solid connection for up to 1 mile. The idea behind this solution is beaming your internet connection from one antenna to the other using directional antennas. As long as the two antennas have a direct line-of-sight, you can transfer high-speed internet reliably using them. Homeowners have the best results mounting these antennas on the roofs of both buildings and direct-connecting the antennas with ethernet cables. It’s possible to achieve good results by placing both devices in windows facing each-other as well if windows are available, but an outdoor installation is best.
Directional antennas are affordable but must be purchased in pairs in order for them to work properly for this transmission method. Antennas are available for as low as $40.00 and can be had at an average price of about $100 a piece, making the average price for a set of two about $200.00. The price goes up slightly when you add the cost of antenna wire, but will only increase the cost by about $10 to $20 for the full setup.
A point-to-point wireless network extension is the best option when you have to send a network connection over distances longer than 328 feet from your home when Ethernet cable will struggle to maintain a reliable signal any longer without the use of a costly Ethernet signal booster.
Simply connect the house antenna to a port on your router using an Ethernet line. Now run an Ethernet cable from the second antenna to your computer in the garage for a direct connection. You can add a network bridge for multiple wired connections, or an access point device for an extended wireless network out in your garage.
Method 7 – Use Buried Ethernet and a Wireless Access Point
If you’re looking for the absolute best network connection, and don’t mind a bit of digging, you can achieve peak results by burying an Ethernet line going from your home to the detached garage. Keep in mind, that with this solution you can only stretch the connection for about 328 feet or 100 meters(Maximum length of CAT 6 Cable). If your line is smaller than 300 feet, you can get a stable connection that won’t drop out in your garage.
To do this, attach your Ethernet line to a port on your router indoors. Now route cable outside and through the conduit that you bury underground. Route the other end of the cable through the wall of your garage and attach it to a network bridge for wired connections or go with a wireless access point to create a wireless network. It’s highly reliable, though time-intensive to set up and will notice wires a lot of visible wires at different places.
Method 8 – Put in an Outdoor Access Point
The final option and one of the most costly to implement is an outdoor access point. This method is the most useful when you want to maximize your signal strength while out in a larger yard or direct your connection to multiple outdoor spaces around your home. All the other methods covered would only direct an internet connection to one section of your yard, while this can effectively get a solid connection out to multiple locations by using multiple access points. This is usually achieved with a buried Ethernet cable and can be time-consuming to implement. You will have to purchase conduit and dig a hole to bury the conduit in. Once the conduit is laid down you need to install the Ethernet cable inside it and route it into your house. Install the access point outdoors near where you want your signal to be. Now run an Ethernet cable to your wireless router indoors. If you are going over distances more than 300 feet from your router, you’ll have to rely on a point-to-point antenna setup, or a Powerline network extender device to get out to your access point device effectively. When installed properly, your wireless access point will give you excellent wireless speeds and should give you a larger network coverage area as well compared to the other options on this list.
An outdoor access point will cost you between $40 and $400 depending on the hardware that you decide on, with the average price of quality equipment being closer to $100 to $200 in price. Outdoor conduit will add to your project cost, or you can invest in a special outdoor-rated Ethernet cable to bury in your yard and skip the conduit entirely.
Whether you want to enjoy internet out in your yard, or you’re looking for a way to get a network connection to a detached building, there are many different solutions for you to rely on today. By getting comfortable with bridge devices, access points, and range extenders or repeaters, you can decide which option will work best for you and what you should be using for your own home. Get the right equipment and you can enjoy a good solid internet connection anywhere that you like around your home.
What is a Wireless Bridge? A wireless bridge is a device that connects wired devices to a network while treating them as a separate section of that network. They can be special devices or modified routers. Bridges are used heavily in commercial installations but can work for residential use as well.
What is an Access Point? An access point connects with a network through ethernet most often and creates a wireless network at the end of the connection. Access point devices are useful when you want to connect to a distant network using wireless devices, rather than wired devices like you would with a wireless bridge.
My current home router
It took 10+ hours of serious research to figure out exactly how to solve my problems with WiFi dead spots in my home. After looking at the information on wireless bridges, powerful routers, power line WiFi Adapters, and repeaters. I came up with these 8 solutions that really work for anyone want extending WiFi reach to detached garages, outdoors and other places in my home.
Extending to a detached Garage/Outdoors:
Getting WiFi out to a detached garage is a serious challenge that many homeowners struggle with when they are setting up wireless connections. Fortunately, there are several different solutions that can effectively solve the problem with a bit of hands-on. Below are the best options from simplest to most difficult to employ.
If you don’t have time to read the whole content, here’s a simple summary of the methods I discussed in the following content:
Ways to Extend your WiFi Range to Garage and Outdoors:
Invest in a More Powerful Router – If you have an older router, or you can’t get enough range with a basic router, you can increase your WiFi network range by investing in a more powerful product.
Use a Wireless Repeater – This is an affordable way to stretch your wireless network in one direction, but only works well over short distances.
Invest in a Powerline Adapter – Choose this option if you have quality wiring through your home and don’t want to run Ethernet lines inside or out.
Buy an External USB Antenna – This is an affordable option that can increase your network strength when a powerful router is already installed.
Use a Point-to-Point Antenna Setup – This is the best option when going over distances longer than 300 or 400 feet.
Bury an Ethernet line and use an Access Point – Do this for the most stable internet connection.
Use an Outdoor Access Point – use this to extend your network to multiple outdoor locations, or into larger outdoor spaces.
Method 1 – Carefully Position Your Router
The simplest solution is to move your router as close to the section of your yard or detached garage you want to be connected as possible. The closer you are to that section of your yard or detached garage or Mother-in-law suite, the better the signal is going to be.
If you have a smaller home, you can probably put your router right near the wall where you want the strongest outdoor signal, and still enjoy a decent connection in the rest of your home. This works well if you can still get a solid connection throughout your home where it matters most.
For a mid-sized home, you should position your router halfway between the center of your home and the garage or section of yard that you want your signal to travel. In this configuration, most of your home will still have a solid internet connection, but you will also extend your network connection beyond the walls of your home as well.
If you have a larger home, your best option is to position your router centrally in your home. This gives you a good signal throughout your space and will often still give you a bit of range out away from your home. You can also change the direction of one or two external router antennas of your router, position those antennas towards to your yard or the outdoor space you want a better signal at to improve the signal range significantly.
Just be careful to put the router in a location that’s going to give you an effective connection throughout your home, otherwise, you’ll have a new problem to solve. If you can’t manage to get the signal far enough outside the walls of your home, you will have to upgrade the router or select one of our other WiFi transmission techniques to get the network connection right where you want it to be.
Method 2 – Get a More Powerful Router
If you’re using an older router or a router with weak transmission power, you can greatly increase your range by upgrading to a modern and powerful router with a higher power level.
Look for a router with many external antennas and powerful amplifiers for the most widespread signal. Just upgrading to a new and more powerful router might be all you need to do to increase the range of your network signal effectively.
The first step to choosing a high-quality modern router is to select an AC router. This is currently the fastest specification, and one of the most reliable for achieving long-range WiFi networks because the router can broadcast both 2.4 GHz and 5 GHz signals at the same time.
The next thing you should look at is the antennas that are included with the router. External and long antennas are important investments. Larger antennas often indicate a larger range transmission as well. Most quality routers have at least four antennas and some have as many as eight antennas that you can rely on. External antennas are important because you can change the direction of your router antenna and increase the Wi-Fi range even further.
Most routers will list their maximum range covered right in the product specifications and it’s important not to take this number as a real-world figure. If a router says it will reach up to 300-foot range, it is more likely to reach between 150 and 200 feet in a real-world situation with walls and other obstacles in the way. Always assume you will get half the rated range or less unless you have an open concept home with very few walls in the way.
Carefully purchase an AC router with a large distance rating and several external antennas for the best results when upgrading your router to help you get an internet connection out to your garage or into your yard.
Method 3 – Use a Wireless Repeater
A repeater is a device that copies your original wireless router’s signal and re-broadcast the signal to help it reach further. Add a repeater as close to your yard or garage as possible while still getting a good signal from your original router with the device.
Most repeaters have an indicator on them letting you know that you still have a strong network connection. Once you get the repeater in the right position, it will send the signal out into the yard effectively by amplifying the signal at the new location.
A wireless repeater is a powerful electronic device that is another source of the same signal that your router already sends out. It takes a strong signal and pushes that signal even further away from the original source. Repeaters are an affordable and simple way to extend the range of your WiFi signal. A decent repeater can be had for less than $25.00 and won’t take long to install. Wireless repeaters can be purchased with ratings at the maximum WiFi transfer speeds available today, but most devices won’t allow you to achieve those speeds even in very good conditions. You can expect between 75 Mbps and 300 Mbps using a quality repeater properly, and the speed you get depends on how far you are away from the repeater when accessing the network, and how many walls the signal is traveling through. Limit these factors as much as possible for the highest speeds.
Method 4 – Get Internet with a Powerline Network Adapter
The next option is what’s known as a Powerline Network Adapter. If you are running power out to your garage from your home, you can send internet connection information through the power lines of your house to get a connection out to your garage.
For this to work, you’ll need a powerline adapter kit and two ethernet cables. Install the first adapter in the same room as your router in your home and run an ethernet cable from the router to the adapter. Now, install the second adapter in your garage and run an ethernet cable from the adapter to your computer. You can also connect a network bridge for multiple wired connections, or an access point for a wireless network out in the space.
A powerline adapter is a set of two devices, a transmitter, and a receiver. The transmitter is connected via an ethernet cable or wireless connection to the router of your home. This provides the transmitter with the necessary internet access. It is then connected to the electrical wiring of your home by connecting it to the nearest outlet. The receiver in the set is connected to an outlet near your home section to which you want to extend the internet. Once it’s plugged in, you can pair the transmitter and the receiver and the two devices will send your internet connection via the power lines of your home.
Method 5 – Add a Powerful USB Antenna to Your Garage
For smaller gaps between home and garage, it’s possible to get a decent WiFi connection just by installing a powerful USB antenna on your computer near the wall closest to the house. A good antenna will pick up on a weaker signal, and you could get a solid connection if your home’s router is near the same side that your garage is located. You likely won’t get a full-speed connection using a USB antenna alone, but it might be enough to give you a good reliable connection. This option is attractive because you won’t have to change your existing router or spend much on equipment. You only need a single USB antenna, but this method won’t work if the WiFi signal is too weak in your garage.
The trick to making this method work well is to purchase a high-quality antenna that’s going to give you the best chance of success. There are many USB antennas available today with below the $20.00 price range, but generally, they aren’t going to do a quality job. When selecting a product you want to look for the proposed maximum range possible, the length, size and number of antennas, the total power output and the maximum speed provided.
Look for antennas that offer 5dBi of power or greater on each antenna. It’s also important to look for a product with detachable antennas that you can use on your computer. Detachable antennas can be replaced with more powerful antennas to give you enhanced range, or they can be extended to a more favorable location using special antenna cable. Either way, detachable antennas give you more control over the effectiveness of your USB antenna setup.
Look for multiple antennas so that you can easily position each antenna in a different direction to maximize your signal strength or help you tune in to multiple WiFi sources. Finally, choose a WiFi antenna that’s AC compatible with a speed rating of around 200Mbps if you can. This means the antenna can deliver very good transfer speeds under optimal conditions. You won’t get those sorts of speeds from your garage or outdoors, but you are more likely to get a superior speed with a higher rated antenna under poor conditions than you would with a lower-rated antenna in those same conditions.
Choosing the optimal USB WiFi antenna takes time, and even after you have a decent product you might have to enhance it further with larger antennas or extension cable, but when installing properly you should have a significantly enhanced WiFi signal at your location.
Method 6 – Lock on with a Point-to-Point Wireless Network
For long-range distances, one of the best options available is a point-to-point wireless network. This technology requires a bit more of an investment but can offer a solid connection for up to 1 mile. The idea behind this solution is beaming your internet connection from one antenna to the other using directional antennas. As long as the two antennas have a direct line-of-sight, you can transfer high-speed internet reliably using them. Homeowners have the best results mounting these antennas on the roofs of both buildings and direct-connecting the antennas with ethernet cables. It’s possible to achieve good results by placing both devices in windows facing each-other as well if windows are available, but an outdoor installation is best.
Directional antennas are affordable but must be purchased in pairs in order for them to work properly for this transmission method. Antennas are available for as low as $40.00 and can be had at an average price of about $100 a piece, making the average price for a set of two about $200.00. The price goes up slightly when you add the cost of antenna wire, but will only increase the cost by about $10 to $20 for the full setup.
A point-to-point wireless network extension is the best option when you have to send a network connection over distances longer than 328 feet from your home when Ethernet cable will struggle to maintain a reliable signal any longer without the use of a costly Ethernet signal booster.
Simply connect the house antenna to a port on your router using an Ethernet line. Now run an Ethernet cable from the second antenna to your computer in the garage for a direct connection. You can add a network bridge for multiple wired connections, or an access point device for an extended wireless network out in your garage.
Method 7 – Use Buried Ethernet and a Wireless Access Point
If you’re looking for the absolute best network connection, and don’t mind a bit of digging, you can achieve peak results by burying an Ethernet line going from your home to the detached garage. Keep in mind, that with this solution you can only stretch the connection for about 328 feet or 100 meters(Maximum length of CAT 6 Cable). If your line is smaller than 300 feet, you can get a stable connection that won’t drop out in your garage.
To do this, attach your Ethernet line to a port on your router indoors. Now route cable outside and through the conduit that you bury underground. Route the other end of the cable through the wall of your garage and attach it to a network bridge for wired connections or go with a wireless access point to create a wireless network. It’s highly reliable, though time-intensive to set up and will notice wires a lot of visible wires at different places.
Method 8 – Put in an Outdoor Access Point
The final option and one of the most costly to implement is an outdoor access point. This method is the most useful when you want to maximize your signal strength while out in a larger yard or direct your connection to multiple outdoor spaces around your home. All the other methods covered would only direct an internet connection to one section of your yard, while this can effectively get a solid connection out to multiple locations by using multiple access points. This is usually achieved with a buried Ethernet cable and can be time-consuming to implement. You will have to purchase conduit and dig a hole to bury the conduit in. Once the conduit is laid down you need to install the Ethernet cable inside it and route it into your house. Install the access point outdoors near where you want your signal to be. Now run an Ethernet cable to your wireless router indoors. If you are going over distances more than 300 feet from your router, you’ll have to rely on a point-to-point antenna setup, or a Powerline network extender device to get out to your access point device effectively. When installed properly, your wireless access point will give you excellent wireless speeds and should give you a larger network coverage area as well compared to the other options on this list.
An outdoor access point will cost you between $40 and $400 depending on the hardware that you decide on, with the average price of quality equipment being closer to $100 to $200 in price. Outdoor conduit will add to your project cost, or you can invest in a special outdoor-rated Ethernet cable to bury in your yard and skip the conduit entirely.
Whether you want to enjoy internet out in your yard, or you’re looking for a way to get a network connection to a detached building, there are many different solutions for you to rely on today. By getting comfortable with bridge devices, access points, and range extenders or repeaters, you can decide which option will work best for you and what you should be using for your own home. Get the right equipment and you can enjoy a good solid internet connection anywhere that you like around your home.
What is a Wireless Bridge? A wireless bridge is a device that connects wired devices to a network while treating them as a separate section of that network. They can be special devices or modified routers. Bridges are used heavily in commercial installations but can work for residential use as well.
What is an Access Point? An access point connects with a network through ethernet most often and creates a wireless network at the end of the connection. Access point devices are useful when you want to connect to a distant network using wireless devices, rather than wired devices like you would with a wireless bridge.
High-speed internet at home is a must-have in the technological age. Just as important, however, is high-range internet, meaning internet that covers all parts of your home. To avoid internet dead...
Woman hand plugging a blue network cable into socket of a white Wi-Fi wireless router on a white wooden table. Wlan router with connected internet cables on a table in a home or office. Rear...